The Solo Mechanic’s Guide: Why Vacuum Brake Bleeders Lie (And the Pressure Fix That Works)

Handheld vacuum guns pull endless false air bubbles past loosened bleeder threads, leaving spongy brake pedals. Learn the Motive dry pressure method for rock-solid brakes solo.
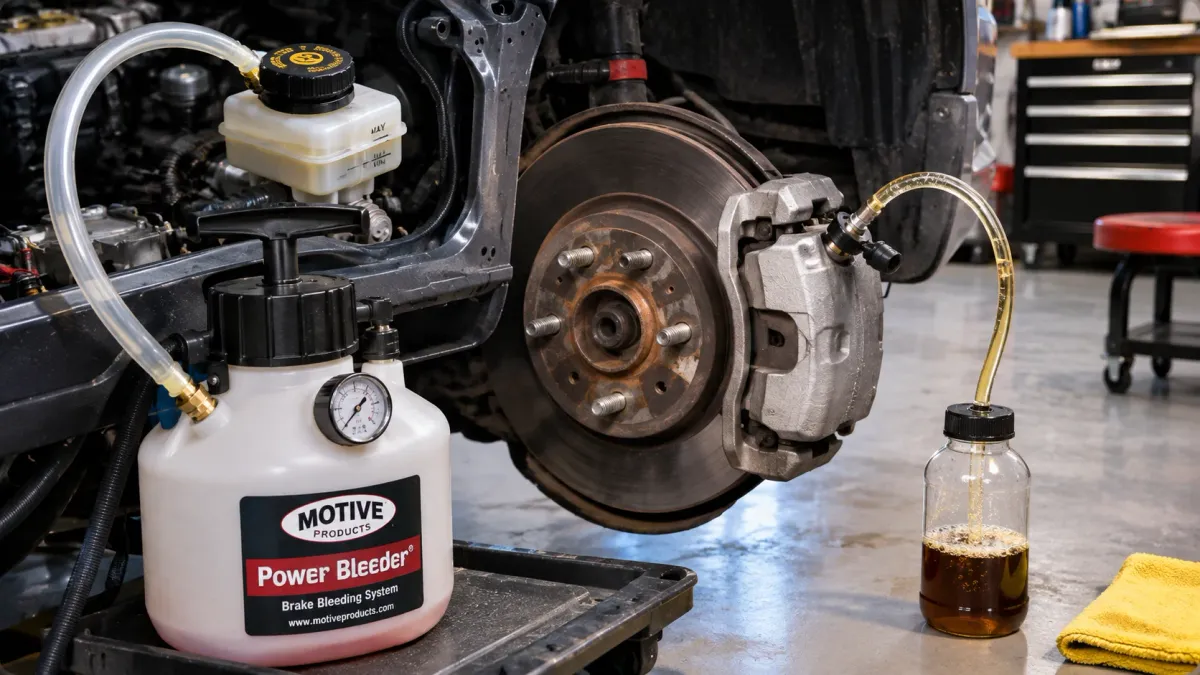
Table of Contents5 Sections
You spend an entire Saturday afternoon installing new ceramic pads and coated rotors on your truck, connect a cheap handheld plastic vacuum pump to the caliper bleeder nipple, and pump the trigger. You suck two full bottles of clear brake fluid through the plastic hose, tighten the bleeder screw, drop the truck off the jack stands, and step on the brake pedal, only to feel it sink completely to the floorboards with zero hydraulic resistance.
Trying to bleed modern automotive brakes alone is one of the most frustrating maintenance jobs in a home garage. Homeowners either recruit an unwilling spouse or teenager to pump the pedal while shouting commands through the garage door, or they buy thirty-dollar vacuum hand pumps that pull endless streams of phantom air bubbles through the bleeder threads.
I spent twenty years servicing hydraulic brake systems on everything from commercial flatbed haulers to track-day cars. In this guide, I explain why vacuum bleeders lie to you about air in your lines, expose the paint-stripping danger of universal master cylinder chain caps, and show you how to execute the professional dry pressure bleeding method that delivers a rock-hard brake pedal every single time.
The Vacuum Lie: Why Mityvac Tools Show Endless Air Bubbles
If you run into stubborn air trapped inside modern electronic ABS solenoids, mechanical pressure bleeding alone might not clear the pedal mush. You will need one of the tools reviewed in my guide to the best bi-directional scan tools for DIY mechanics to command automated ABS pump bleed sequences.
Handheld vacuum bleeders like the Mityvac operate on a simple theoretical premise: you attach a clear hose to the caliper bleeder screw, pump a hand trigger to create negative pressure (-15 inches of mercury), crack the bleeder screw open half a turn, and let vacuum pressure suck old fluid and air out into a collection jar.
In practice, that negative pressure creates an immediate physical illusion. Bleeder screw threads do not feature rubber O-rings; they seal strictly by metal-to-metal interference when the tapered nose of the screw seats tightly into the machined caliper body.
The moment you crack the bleeder screw open half a turn to allow fluid flow, the mechanical seal across the threads opens up. The high vacuum inside your hose pulls outside atmospheric air straight down through the microscopic gap between the male screw threads and the female caliper casting.
As a result, you watch a continuous, furious stream of tiny bubbles rushing down the clear plastic hose for thirty minutes. You keep pumping, assuming your brake lines are packed with air, until you accidentally drain the master cylinder dry, pulling air pockets deep into the ABS modulator pump valves (which then requires an expensive bi-directional scan tool to cycle and bleed).
Solo Brake Bleeding Method Comparison: Tradeoffs & Pedal Feel
Analyze speed, pedal firmness, and failure risks across three solo bleeding techniques.
Gravity bleeding: opening caliper bleeders and letting fluid drip into pans via gravity
Handheld vacuum pump extraction attached to caliper bleeder nipples
Motive Power Bleeder pressurized tank attached to master cylinder reservoir
Why Pressure Bleeding Wins (The Motive Advantage)
Professional automotive technicians do not suck fluid from the bottom; they push fluid from the top using positive pressure.
A pressure bleeder, such as the Motive Power Bleeder, consists of a heavy-duty plastic tank equipped with a manual pump, pressure gauge, delivery hose, and a threaded adapter cap that seals tightly onto your vehicle’s master cylinder reservoir.
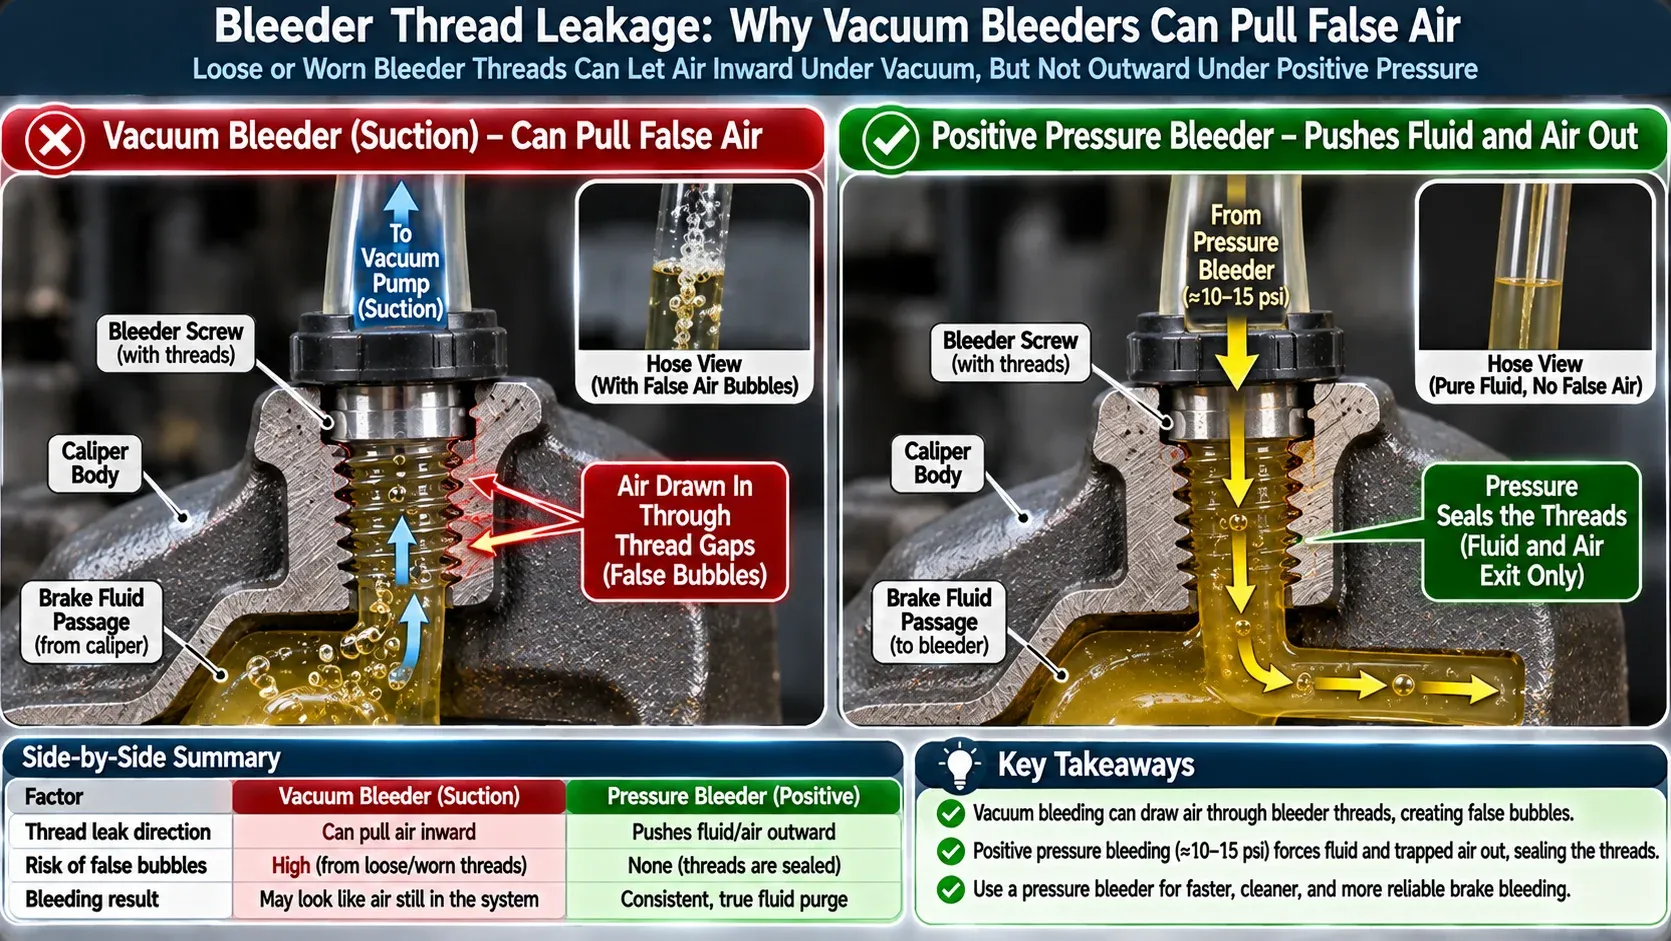
Macro cross section comparison of brake caliper bleeder threads, left showing vacuum bleeder drawing false air bubbles through loose threads, right showing positive pressure bleeder pushing pure fluid and air outward with zero aeration leaks, clean technical visual.
You pressurize the system to 10 to 15 PSI. This constant positive pressure forces fresh brake fluid through the master cylinder, through the ABS valving blocks, down the metal chassis lines, and into each caliper.
Because fluid and air are under continuous positive pressure, outside air cannot physically slip past the bleeder threads. When you open a caliper bleeder screw, old discolored fluid and trapped air bubbles are forced out into your catch bottle smoothly.
When the stream runs crystal clear with zero bubbles, you close the bleeder screw knowing with 100 percent certainty that the line is completely solid.
The Pro “Dry Method”: Zero Mess, Zero Cleanup
Complying with Society of Automotive Engineers (SAE J1703) motor vehicle brake fluid specifications, glycol-based fluids are extremely hygroscopic and must never be exposed to open atmospheric humidity during prolonged service operations.
The manufacturer instructions for the Motive Power Bleeder advise pouring two quarts of fresh brake fluid directly into the plastic pressure tank, pumping it up, and letting the tool feed fluid automatically into the master cylinder.
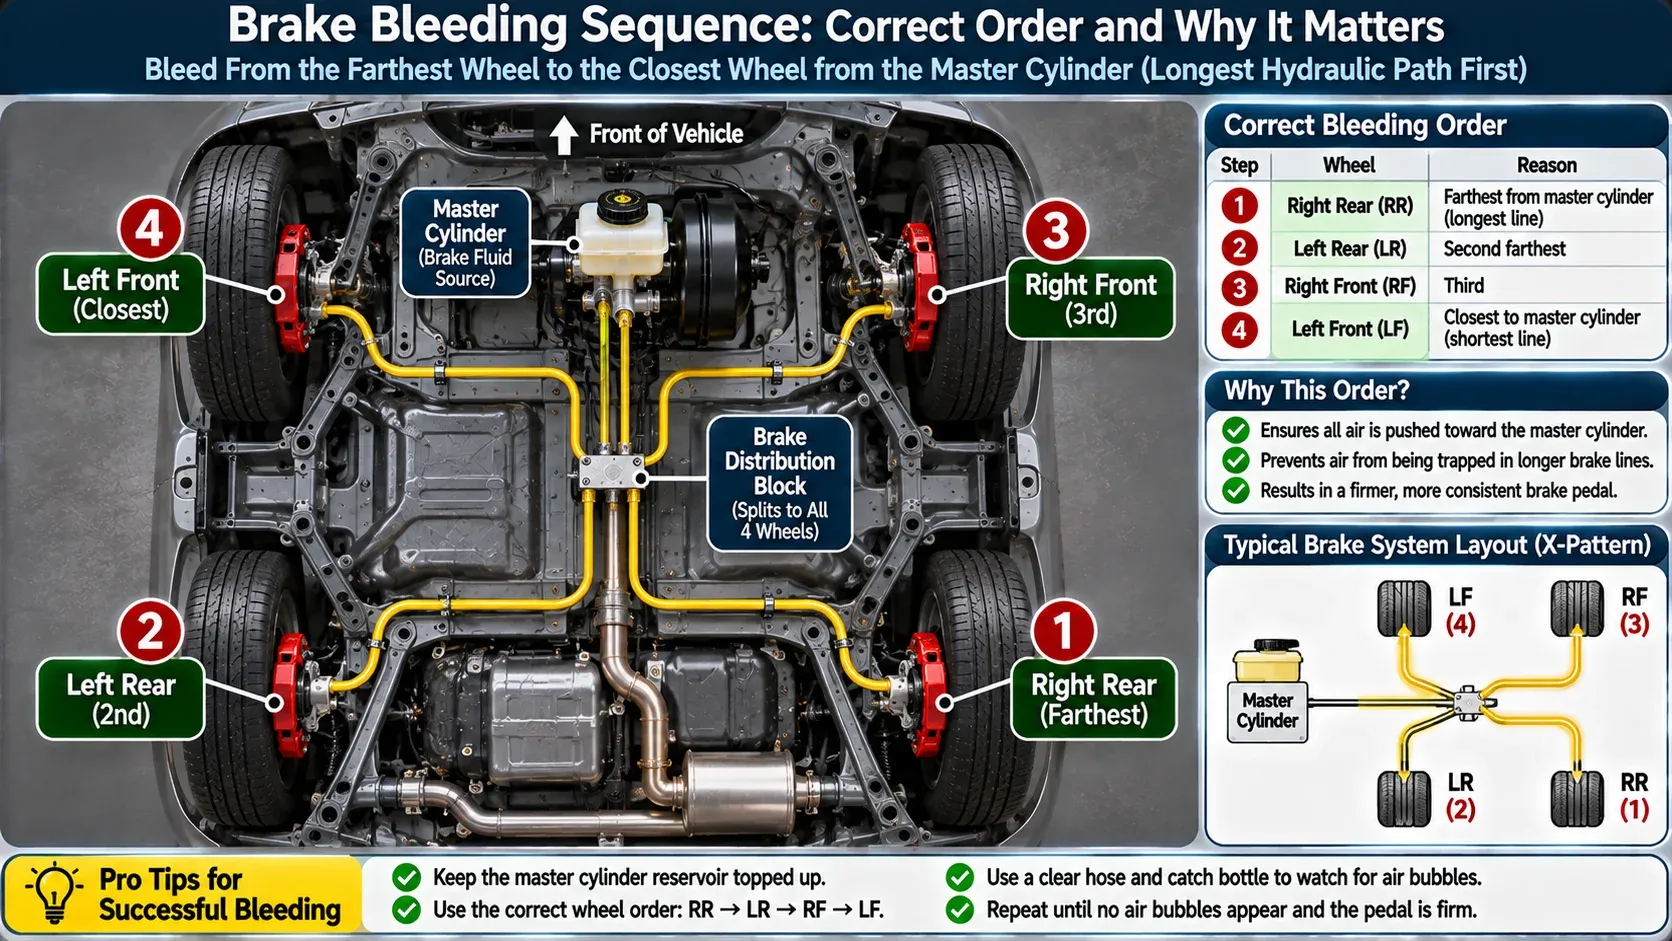
Top-down schematic of an automobile chassis showing correct brake bleeding sequence from master cylinder, numbered circular callouts 1 through 4: 1 right rear, 2 left rear, 3 right front, 4 left front, hydraulic line paths highlighted, clean professional automotive service guide.
While that factory method works, it creates a messy shop chore. Polyethylene tanks absorb brake fluid over time, and cleaning two quarts of glycol-ether fluid out of the pump cylinder, pressure gauge, and delivery hose with denatured alcohol after every brake job wastes time and clean rags.
Professional mechanics on garage forums utilize the Dry Method instead:
- Top off the vehicle’s master cylinder reservoir with fresh brake fluid directly up to the base of the plastic filler neck.
- Thread your Motive adapter cap onto the reservoir, but leave the Motive tank completely dry (holding pure compressed air).
- Pump the dry tank up to 12 to 14 PSI. The clean compressed air acts as a constant pneumatic spring pushing down on the fluid inside the car reservoir.
- Go to your farthest wheel (passenger rear), open the bleeder screw, and bleed roughly four ounces of old fluid into a catch bottle until the reservoir level drops to the minimum line. Close the bleeder screw.
- Release the pressure on the Motive tank by unscrewing the pump cap a quarter-turn, top off the car’s master cylinder with fresh fluid, repressurize the dry tank, and move to the next wheel.
This dry procedure takes under thirty minutes for all four wheels, leaves your Motive tank clean and dry for storage, and prevents dangerous fluid spills.
The Universal Cap Danger: Why You Must Buy Dedicated Adapters
When shopping for pressure bleeders, you will encounter generic kits that include a universal flat rubber cap secured by steel chains and wing nuts that hook under the master cylinder casting.
Never use a chain-tensioned universal rubber cap on a modern plastic master cylinder. At 15 PSI of pneumatic pressure, plastic master cylinder reservoirs flex, causing the generic rubber pad to slip sideways.
Brake fluid (DOT 3 and DOT 4) is an aggressive solvent that strips automotive paint down to bare sheet metal within ten minutes. If a universal chain adapter blows off under 15 PSI, it atomizes pressurized brake fluid across your engine bay, stripping paint off inner fenders and clouding polycarbonate headlight housings.
Always purchase a custom CNC-machined aluminum or threaded heavy composite adapter engineered specifically for your vehicle brand (such as Motive Black Label metal caps). A dedicated threaded cap locks onto your reservoir neck with factory precision, withstanding thirty pounds of pressure without weeping a drop.
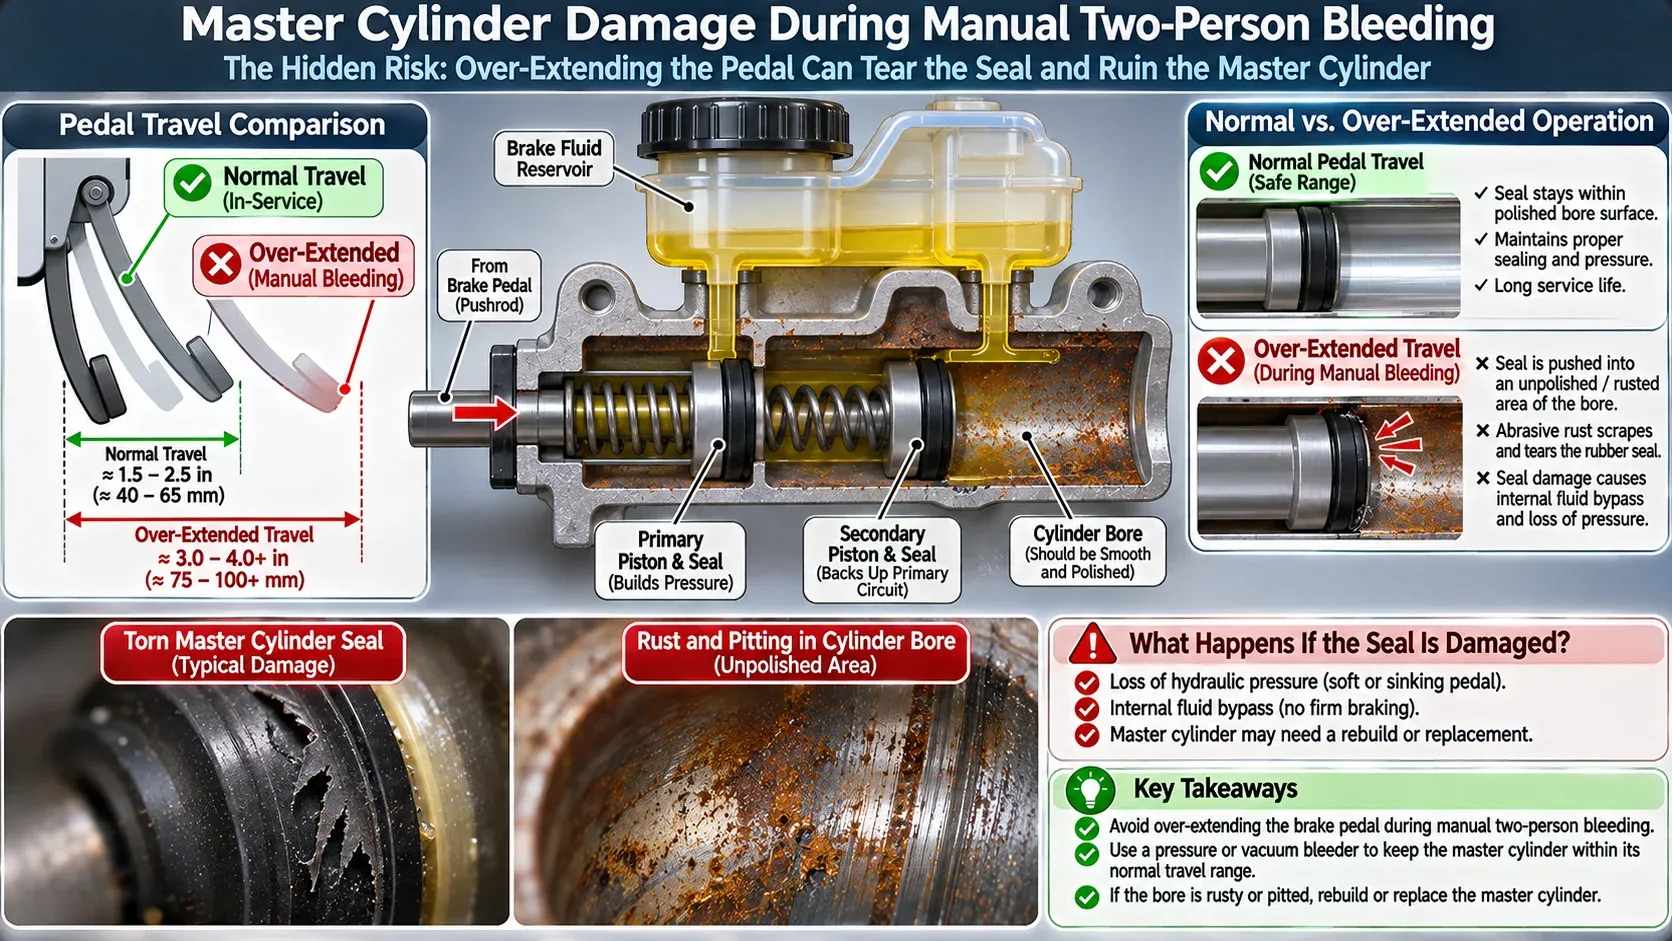
Technical cross section diagram of an automotive brake master cylinder, showing normal pedal travel range vs over-extended travel during manual two-person bleeding, piston seal scraping against rusted unpolished cylinder bore causing seal tearing and pressure loss, clear labeled engineering callouts.
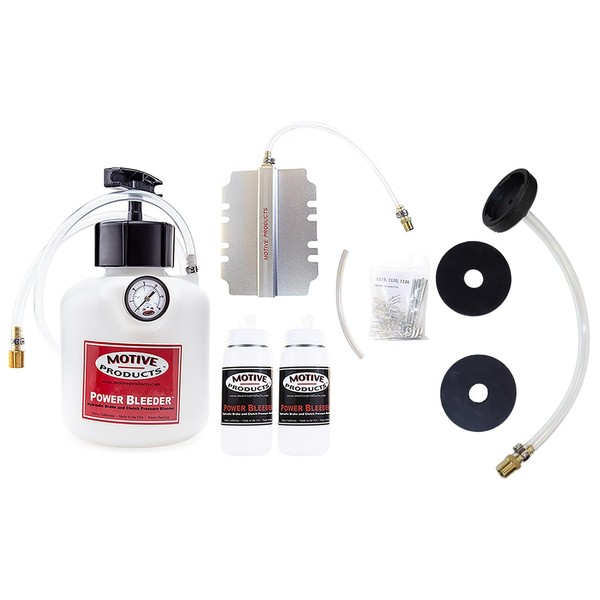
Motive Products Power Brake Bleeder Kit (Custom Cap Fitment)
Best For: Flushing and bleeding automotive brake systems solo
Est. Price: $65 - $85
"The definitive, lifetime-durable tool for bleeding brakes alone, delivering a rock-hard pedal in thirty minutes with zero guesswork."
- +Delivers consistent 10-15 PSI positive pressure from the master cylinder down
- +Completely eliminates false air bubbles caused by loose bleeder threads
- +Accurate built-in pressure gauge prevents over-pressurizing plastic reservoirs
- -Must verify vehicle-specific threaded adapter cap before ordering
- -Hose requires releasing tank pressure before disconnecting from reservoir
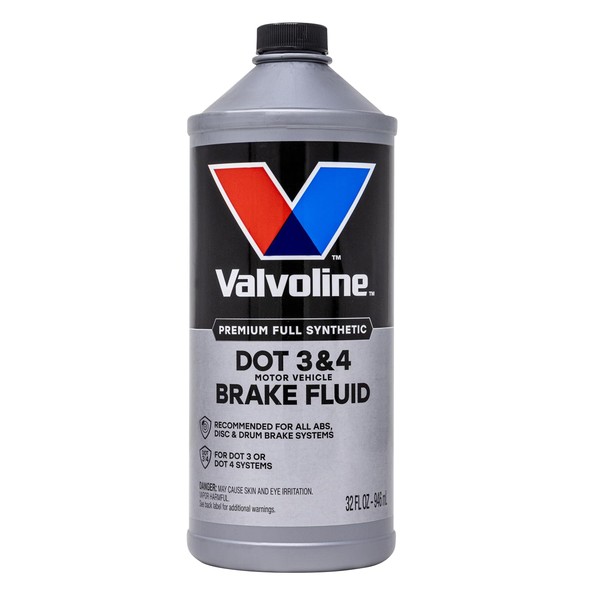
Valvoline DOT 3 & DOT 4 Synthetic Brake Fluid (32 oz)
Best For: Complete system hydraulic fluid flushes
Est. Price: $9 - $13
"A premium, affordable synthetic brake fluid that exceeds OEM boiling point standards for fade-free pedal response."
- +High dry boiling point (480°F) prevents fluid vaporization under heavy braking
- +Fully compatible with all standard DOT 3 and DOT 4 disc and drum systems
- +Low-moisture synthetic formulation resists long-term corrosion inside calipers
- -Hygroscopic fluid absorbs ambient moisture; keep bottle sealed tightly
- -Will strip automotive paint upon contact; keep clean water spray bottle nearby
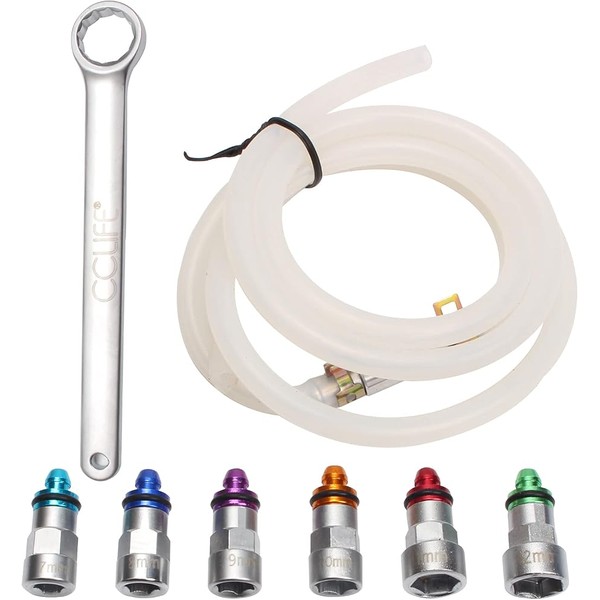
Brake Bleeder Wrench with Integrated Check Valve & Silicone Hose
Best For: Clean caliper nipple opening without messy leaks
Est. Price: $18 - $24
"A brilliant, clean-draining wrench accessory that eliminates rounded bleeder screws and keeps brake fluid off your wheels."
- +Internal silicone seal fits snugly over bleeder nipple to stop fluid drips
- +Six-point box wrench design prevents rounding off frozen bleeder hex heads
- +Integrated one-way check valve prevents air back-siphon during line closing
- -Must verify whether your calipers use 8mm, 10mm, or 11mm bleeder nipples
- -Requires gentle breaking force on seized rusted bleeders before use
Preparing Your Vehicle and Workshop for Brake Service
Bleeding a vehicle’s hydraulic system is fast and comfortable when your garage lifting equipment provides secure, level vehicle elevation.
Lift all four wheels off the floor safely to access calipers sequentially in under twenty minutes by reviewing our low-ceiling evaluation of the QuickJack portable car lift.
If you are using conventional jacks, protect your safety underneath the vehicle by following our essential checklist on never getting under a car without double-locking jack stands.

Hank Miller
Hank is a master craftsman and DIY mechanic based in Ohio. He tests workshop equipment, garage floor coatings, and power tools under brutal, real-world workshop conditions, with zero paid brand sponsorships.