How to Cut 4x8 Plywood Sheets by Yourself (Why Table Saws Cause Kickback in Small Garages)

Wrestling a 75-pound plywood sheet onto a small jobsite table saw causes violent kickback. Learn why track saws on rigid foam sheets cut straight, safe, and solo.
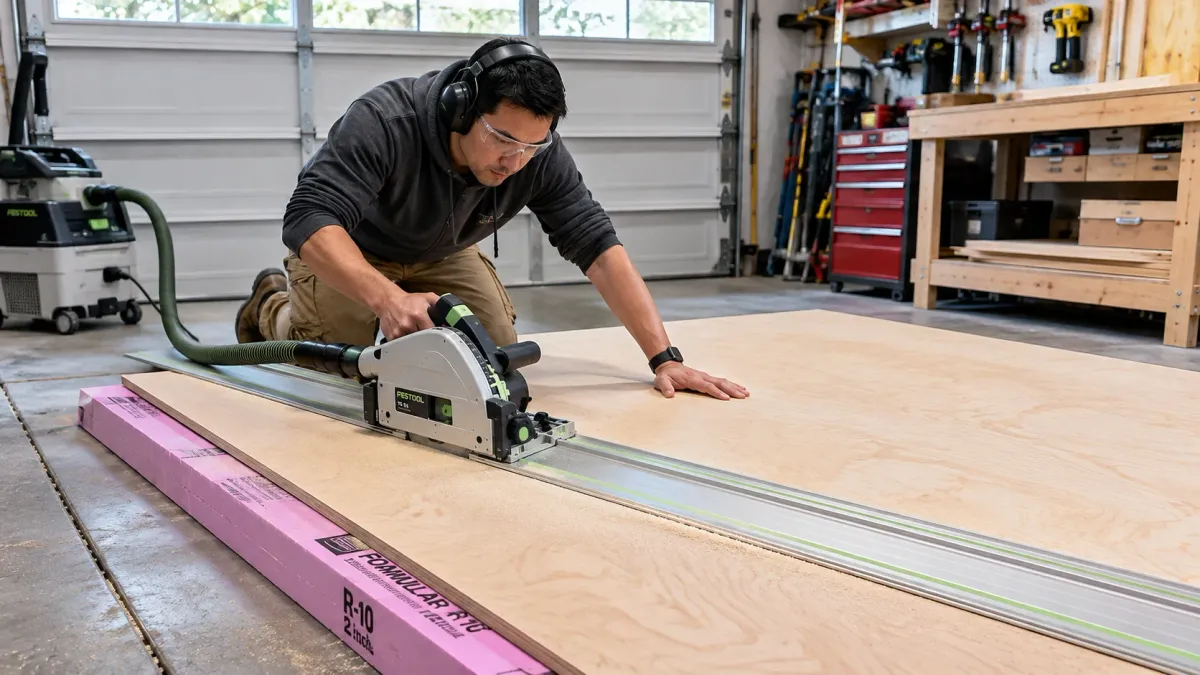
Table of Contents5 Sections
You stand alone in your two-car garage holding a 75-pound sheet of three-quarter-inch cabinet plywood, balancing the awkward four-by-eight panel on your hip as you shuffle toward a portable jobsite table saw. You push the front edge onto the aluminum table, lean forward to keep the panel tight against the rip fence, and watch the back end sag toward the floor.
As the wood tilts, the saw kerf pinches tightly against the rear teeth of the spinning blade. The electric motor screams under load, acrid smoke pours from burning veneer, and in a split second, the four-thousand-RPM blade launches the entire sheet backward into your ribcage like an artillery shell.
Table saw kickback on full four-by-eight sheet goods sends thousands of woodworkers to emergency rooms every year with broken ribs, shattered fingers, and severe puncture wounds. Trying to wrestle massive sheet goods across a lightweight jobsite saw in a cramped garage is a recipe for physical disaster.
I spent twenty years breaking down raw sheet goods in commercial fabrication shops and private garages. In this guide, I explain the mechanical physics behind table saw kickback, show you why you should bring the saw to the wood rather than the wood to the saw, and walk you through a twenty-dollar rigid foam setup that lets you slice full sheets solo with laser precision.
The Physics of Table Saw Kickback: Why Full Sheets Are Lethal
According to OSHA Standard 1926.304 woodworking machinery safety regulations, operating a table saw without stable infeed and outfeed support dramatically elevates the risk of severe workpiece kickback.
A table saw is engineered for extreme precision, but it demands that the workpiece stay flat on the tabletop and parallel to the fence throughout the cut.
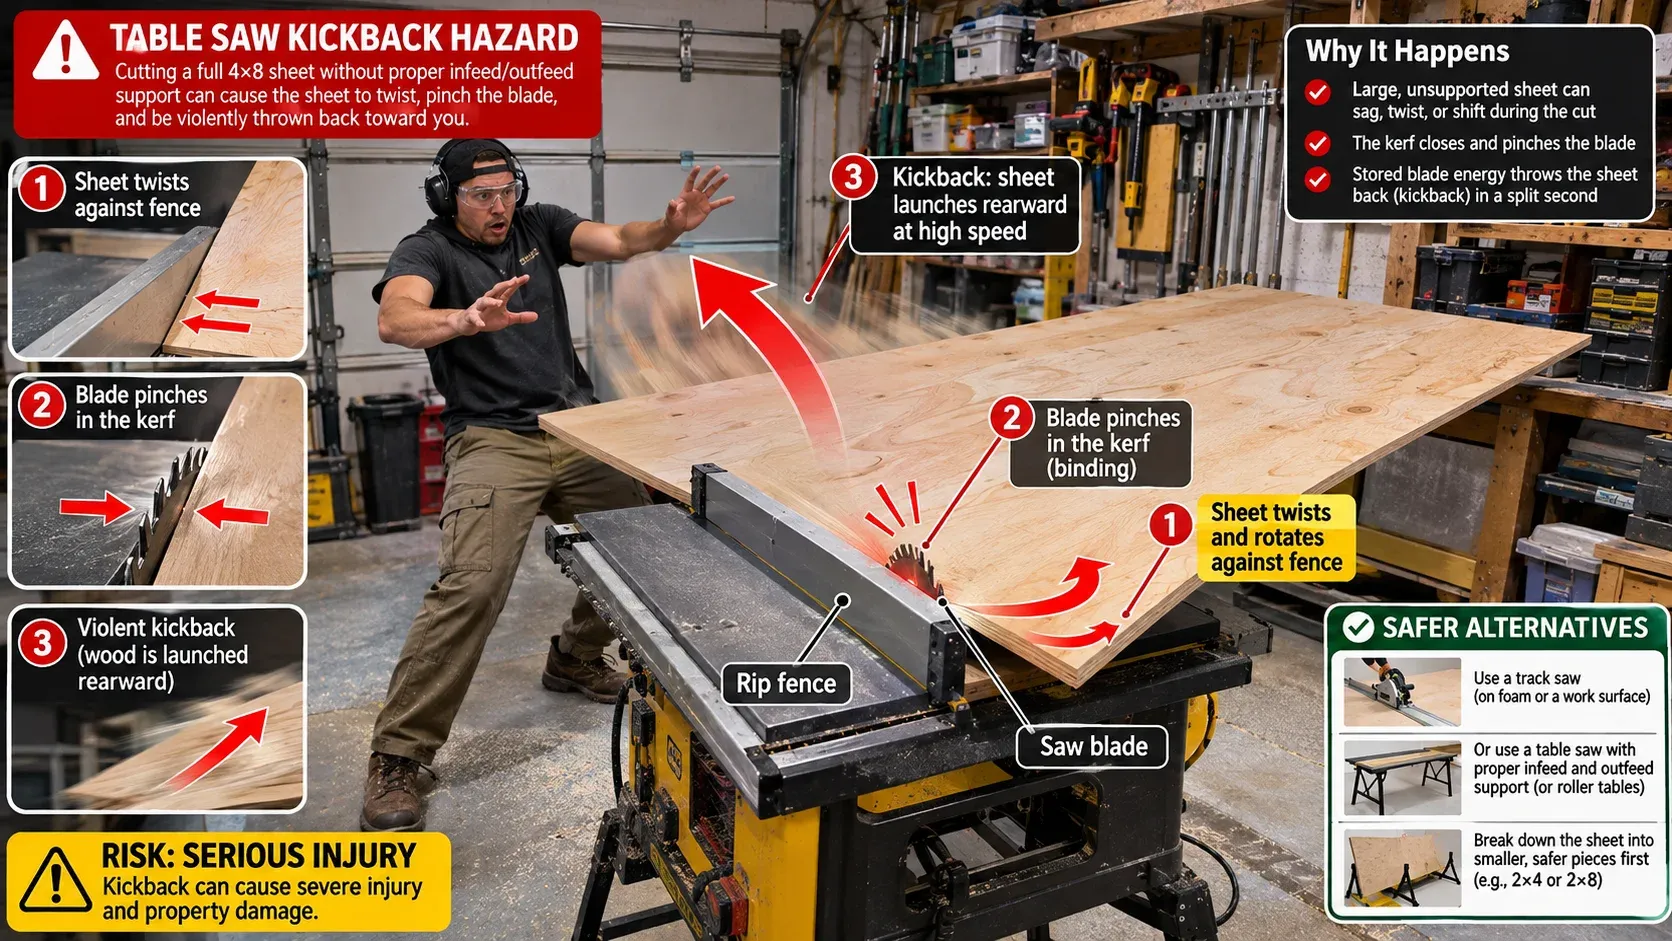
Technical workshop safety diagram illustrating table saw kickback hazards when cutting full 4x8 plywood sheets without infeed/outfeed support, showing sheet twisting against rip fence, blade pinching in kerf, and explosive rear kickback trajectory arrows in small cluttered shop, clear warning graphic.
When you attempt to rip an eight-foot panel on a saw that has a tabletop measuring only twenty-four inches deep, you are dealing with extreme lever arms. An eight-foot sheet extends three feet behind the saw blade before you even start the cut, and hangs three feet past the back edge as you finish.
If your stance wavers or your hands slip by a mere sixteenth of an inch at the back edge of that eight-foot lever, the front edge twists inside the cut. This lateral torque forces the kerf against the upward-spinning teeth at the rear of the blade (a condition called blade binding).
Those rear teeth bite into the solid wood, lift the panel upward off the table, and fling the 75-pound board backward at seventy miles per hour. Roller stands often worsen the problem; when an unbalanced sheet pivots, single-leg roller stands tip over, pulling the workpiece off the fence and causing an immediate stall or kickback.
The Golden Rule: Bring the Tool to the Wood, Not the Wood to the Tool
Once you cut down your full sheets, organize your off-cuts and dimensional stock safely off the garage floor. Read my comparison on building wall-mounted lumber storage racks to store sheet goods cleanly against your garage studs.
In modern European cabinet shops and professional architectural millwork facilities, workers rarely push full raw plywood panels across table saws. Instead, they operate on a simple shop rule: bring the tool to the wood, never the wood to the tool.
Instead of lifting a heavy panel into the air and attempting to glide it across a fixed spinning blade, you leave the plywood completely stationary and flat. You lay a rigid aluminum guide rail across the sheet, place a lightweight eight-pound plunge-cut track saw on the rail, and walk smoothly down the track to make your cut.
Because the heavy wood panel never moves, you eliminate 100 percent of the balancing strain, fatigue, and kickback hazard. You achieve arrow-straight cuts that rival a ten-thousand-dollar industrial sliding panel saw, all while working completely alone in a single garage stall.
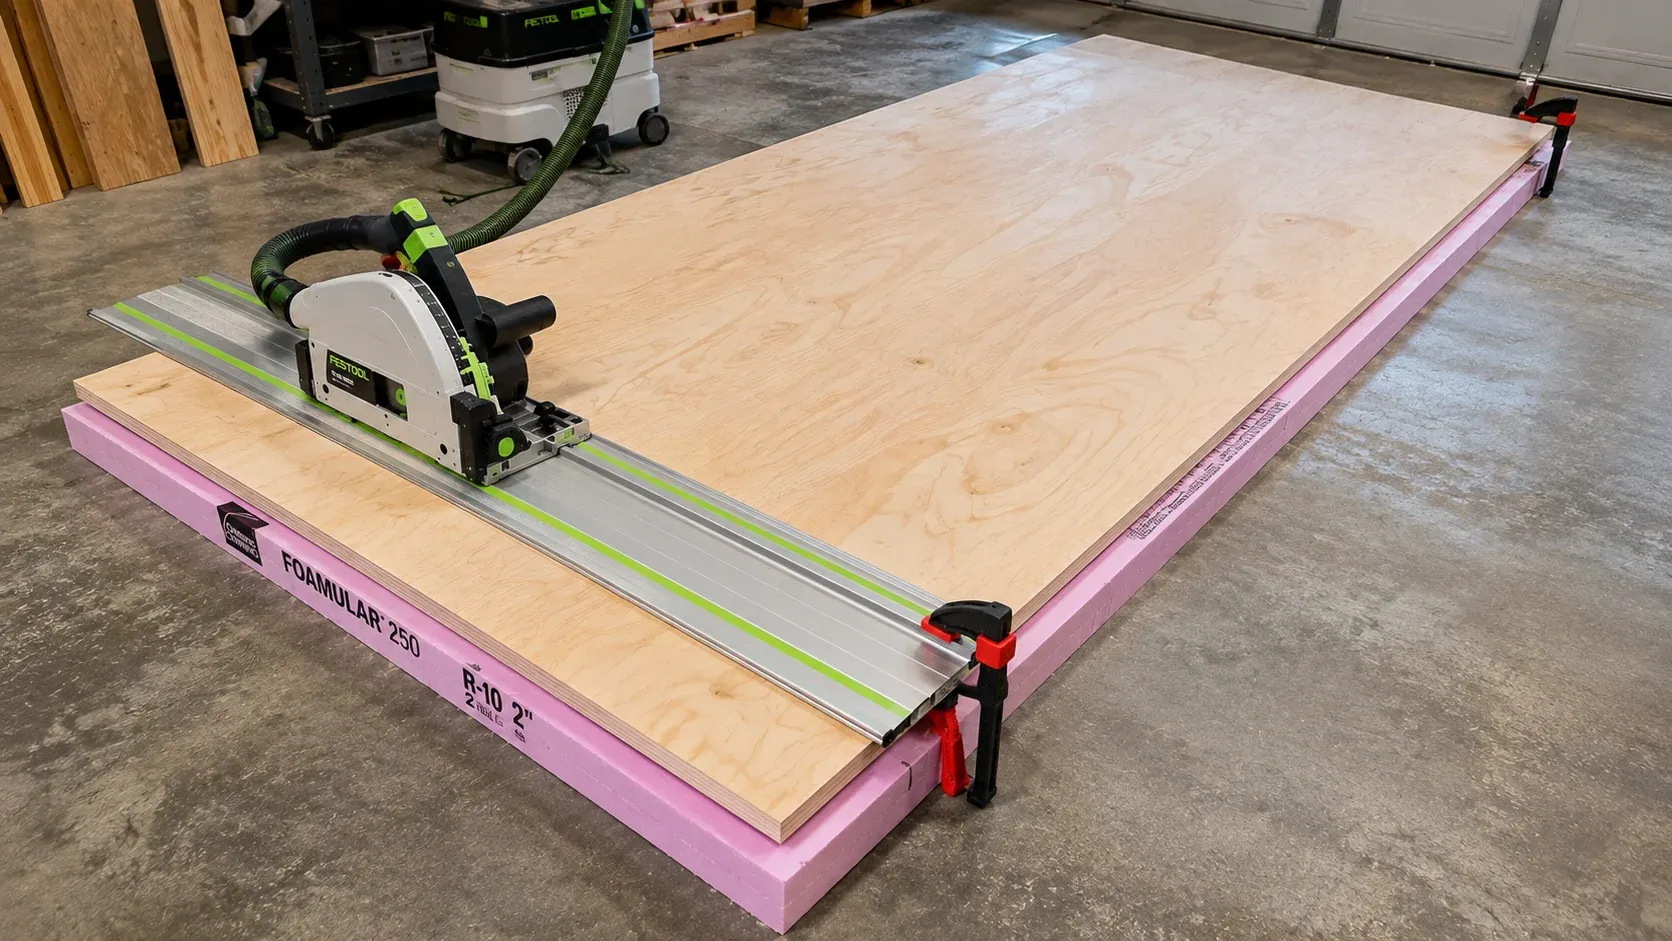
Extreme macro close-up photo of a track saw blade cutting through fine birch plywood along the rubber splinter guard edge of an extruded aluminum guide rail, showing perfectly crisp cut line with zero splintering or tear-out on delicate top veneer, razor sharp focus.
Sheet Breakdown Method Matrix: Matching Budget & Space to Safety
Select the best panel-cutting method based on your available floor space and tooling budget.
Occasional hobbyist cutting 2 to 3 plywood panels per year on a tight budget
Active DIYer building custom garage cabinets, workbench tops, or home furniture
Attempting to rip 3/4-inch sheets alone on a 10-inch portable jobsite table saw
The $20 Floor Station: Why Rigid Foam Board Is Pure Genius
The most versatile, reliable panel-cutting station you can set up in a home garage costs twenty dollars and stores flat against the wall behind your workbench.
Go to the insulation aisle of your local building supply center and purchase a single four-by-eight sheet of 1.5-inch or 2-inch thick rigid Expanded or Extruded Polystyrene foam board (the pink or blue insulation board). Lay that sheet of foam directly on your garage concrete floor, and lay your four-by-eight plywood panel flat on top of the foam.
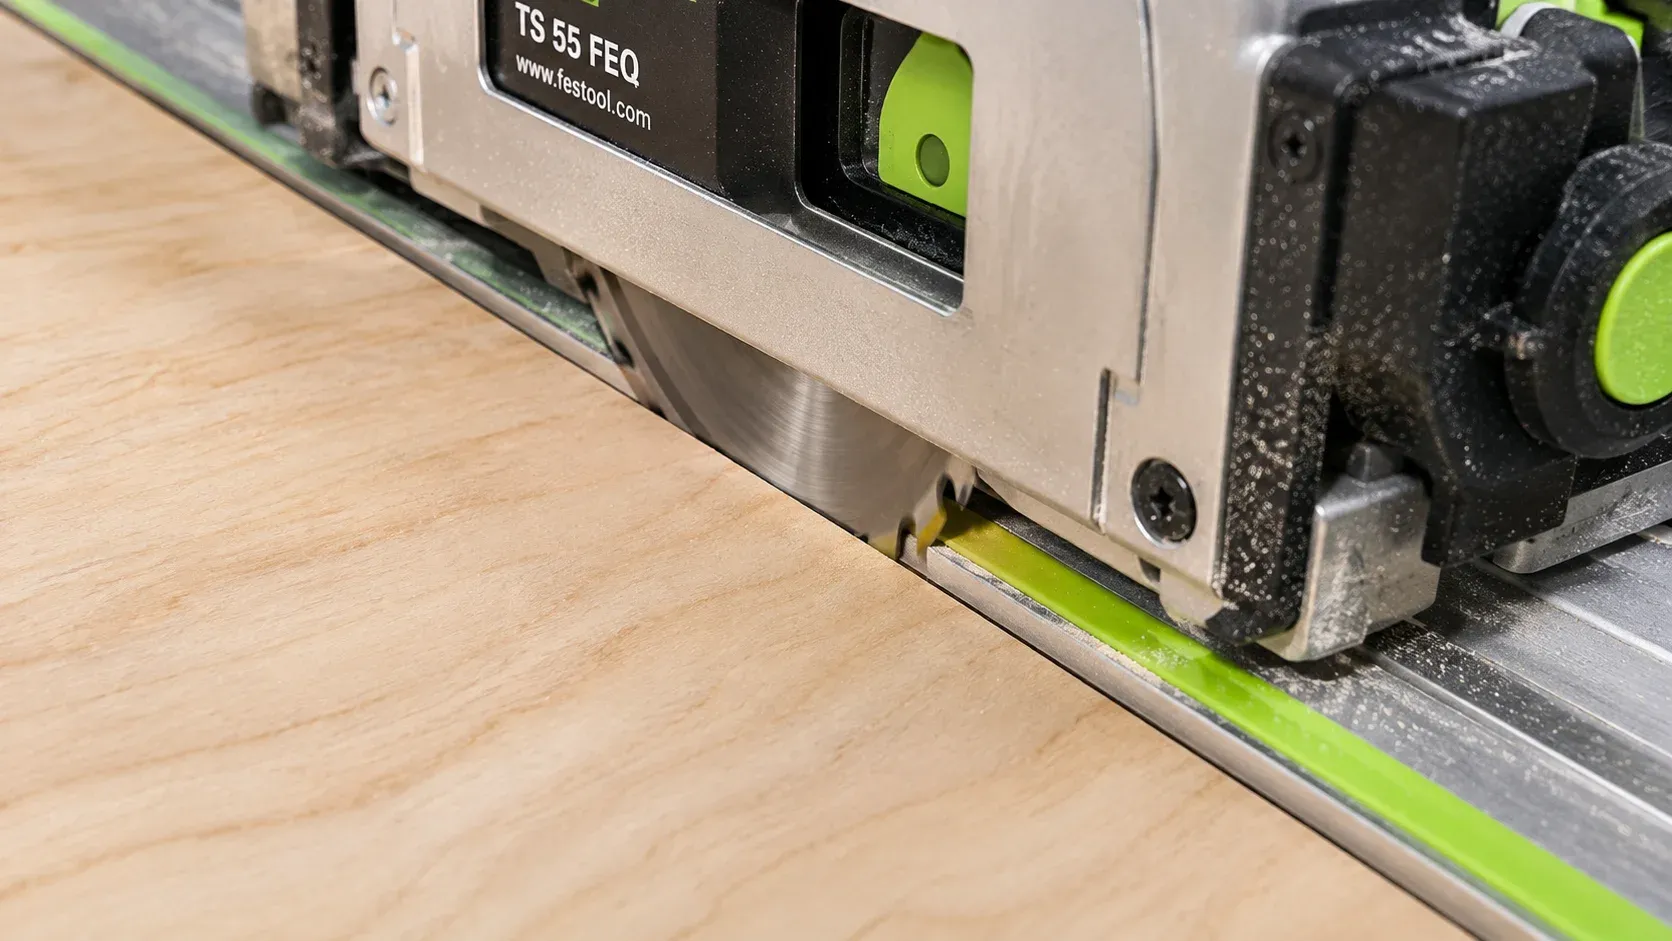
Overhead perspective photo of a full 4x8 sheet of plywood resting flat on top of a 2-inch pink extruded polystyrene (XPS) rigid foam insulation board on clean garage concrete floor, aluminum track saw guide rail clamped in place for a rip cut, blade set 1/8 inch deeper into foam, crisp detail.
Adjust your circular saw or track saw depth-of-cut so the teeth plunge through the bottom of the plywood by exactly one-eighth of an inch. When you make your cut, the blade slices cleanly through the wood and scores shallowly into the top of the foam board beneath.
This simple setup delivers three immense advantages:
- Continuous Total Support: Both halves of the cut panel remain fully supported across 100 percent of their surface area before, during, and after the cut.
- Zero Kerf Pinching: Because neither side can sag, fall, or bend, the wood fibers never pinch the saw blade, completely eliminating blade stalls and kickback.
- Zero Splintering: The dense foam beneath the cut acts as a continuous zero-clearance backer, preventing fragile bottom veneer from splintering.
Preserving Your Back: The Folding Bora Centipede Stand
Cutting panels on the concrete floor on a sheet of rigid foam is foolproof, but crawling around on your knees to cut wood can strain your lower back if you are building an entire kitchen or wall of garage storage cabinets.
If you want an elevated cutting platform without building a massive permanent workbench that takes up half your parking stall, use an expanding accordion work stand like the Bora Centipede.
A four-by-eight Bora Centipede consists of heavy-duty tubular steel struts that fold out like a camping chair in five seconds, providing fifteen interconnected steel support points capable of holding three thousand pounds.
Drop your two-inch rigid foam sheet directly on top of the Centipede frame, slide your heavy plywood panel onto the foam, and make your track saw cuts standing comfortably at standard waist height. When you finish your cuts, fold the stand up into its canvas carry bag and tuck it into a closet.
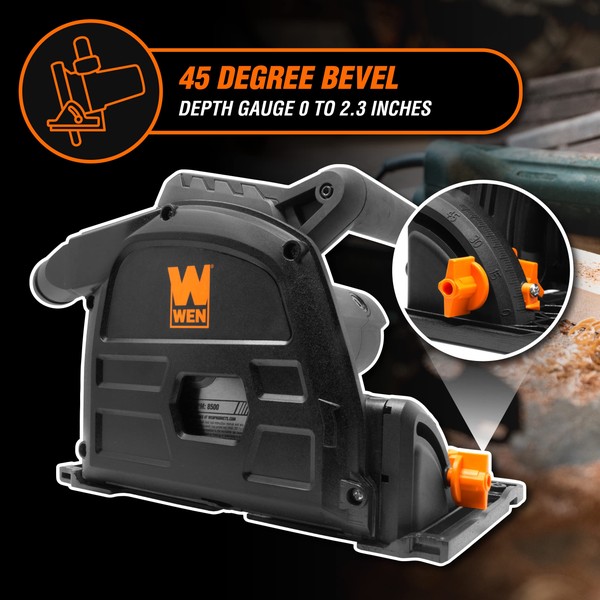
WEN CT1065 10-Amp 6.5-Inch Plunge Cut Track Saw with 100-Inch Track
Best For: Breaking down 8-foot plywood sheets with cabinet-grade precision
Est. Price: $180 - $210
"The undisputed king of budget track saws, giving DIYers cabinet-shop straight cuts on full plywood sheets without the table saw danger."
- +Includes two 50-inch interlocking aluminum tracks for ripping full 8-foot sheets
- +Plunge-cutting action and rubber anti-splinter strip prevent surface tear-out
- +Costs one-third the price of European commercial track saw systems
- -Track connecting bars require careful alignment with a long straightedge
- -Stock blade benefits from upgrading to an ultra-fine finish blade

Bora Portamate Centipede 4x8-Foot Work Stand (CK9S)
Best For: Waist-height panel cutting without permanent workbench clutter
Est. Price: $140 - $170
"The ultimate back-saving panel support system for small workshops, delivering massive load capacity that packs away in seconds."
- +Deploys in five seconds to provide a massive 4x8-foot waist-height work surface
- +Heavy-gauge steel lattice supports up to 3,000 pounds of lumber
- +Folds into a compact carry bag that stores vertically in any closet
- -Must be paired with a sheet of rigid foam board to make through-cuts
- -Center struts require level concrete flooring for maximum stability

Freud Diablo 6.5-Inch 48-Tooth Fine Finish Track Saw Blade
Best For: Splinter-free cuts on expensive veneered sheet goods
Est. Price: $38 - $46
"A premium fine-finish blade that transforms budget track saws into precision cabinet tools, delivering crisp veneer edges on both sides."
- +High-density TiCo carbide teeth leave glass-smooth, ready-to-finish edges
- +Laser-cut stabilizer vents trap vibration and eliminate blade chatter
- +Perma-SHIELD non-stick coating prevents pitch and resin buildup
- -Thin-kerf design requires verifying riving knife thickness on some saws
- -Not intended for cutting nails, screws, or dirty dimensional lumber
Safe Assembly in a Small Garage Workshop
Once you break full four-by-eight plywood panels down into manageable cabinet components, move the pieces to a dedicated work station for joinery, pocket-screwing, and final assembly.
Assemble and clamp your projects on a rigid, dead-flat work surface by following our construction blueprint for the wobble-free garage workbench.
Ensure your cutting and sanding stations do not fill your garage with fine airborne dust by pairing your tools with the filtration setups in our guide on woodworking dust collection in a small garage.
Hank Miller
Hank is a master craftsman and DIY mechanic based in Ohio. He tests workshop equipment, garage floor coatings, and power tools under brutal, real-world workshop conditions, with zero paid brand sponsorships.